Troubleshooting – Printer Prints Blank Pages Issue
Printer Prints Blank Pages- Printers have made their seats in all commercial and homes; wherever there is a need for printing jobs. Printers seem to be a magic box until they keep printing your pages without any interruption. The moment you get to see any printer error such as Printer Prints Blank Pages sometimes, you start feeling like throwing it; especially when you are not able to resolve the issue.
Printer printing blank pages are an equally frustrating situation as printer malfunctioning. This post will make you learn about various worth trying troubleshooting steps to resolve this issue.
Solution 1: Check if your Printer can create Copy
- You can work with adjusting the printer driver configuration that can allow the printer to work correctly on your operating system.
- To avoid more confusion, you should update the installed printer driver from the CD. You can also get the driver from the printer website.
- Uninstall and reinstall any other (if required) printer software from your system.
Restart your printer and give a new print command to see if you are getting correct prints now. If not, move on to the next step to resolve this issue.
Solution 2: Check Ink Cartridges Status
Directly or indirectly, ink cartridges play a vital role in the functioning of any printer. The malfunctioning of the printer’s ink cartridges could be the reason for this situation, and you will be getting blank pages. Do these following checks:
- Check if all the ink cartridges are rightly installed.
- Remove all the cartridges one by one; shake them gently and replace them on their position.
- Check the ink level of all cartridges; low ink level can create various errors.
- For newly installed cartridges; ensure you have peeled off the “Security Seal” from cartridges before installing them.
Done with all these checks; now restart your printer and wait until it completes its rebooting process.
Give a print command again to see if it prints well.
To study further about fixing cartridge error on the printer; click here.
Solution 3: Check the Printhead Status
If you use your printer irregularly, then the possibilities of clogging ink on the printhead are great. To clear this obstacle, you need to do the automatic Nozzle test on repeat; say for 2-3 times at least. Doing this will clean any jammed ink and unclog the printhead outlet tube. Do the following:
Method 1: Nozzle Cleaning on Touchscreens Printers
- Tap to select the “Ink” button on the Printer’s display touchscreen.
- Choose the “Cleaning” option.
- Select the ink/color one by one for nozzle (attached to every ink) to clean. You better choose all nozzles.
- The printer will start doing its nozzle cleaning job. The screen will display the message when the cleaning is done.
Keep repeating the process until you start getting perfect prints.
Method 2: Nozzle Cleaning on Printers (Without Touchscreens)
- Press the “Ink” button or the “Menu” on your Printer.
- Choose for the “Cleaning” option, and hit “OK.”
- Select single or all nozzles to start the cleaning process.
The preceding steps are identical to the process mentioned above in the previous method.
Keep in mind to restart your printer every time you are done with trying any of these above-stated methods. The printer needs time to know about any new settings made; for that restart is a must.
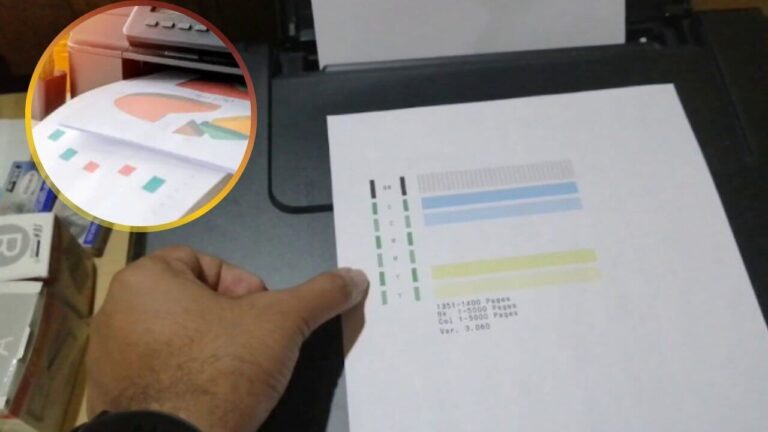
You should also print a Test copy after every troubleshooting step; to verify if your printer is out of its problem or not. If you are getting prints i.e., text or images in proper format and color that means you have resolved the issue successfully.

Great site. A lot of helpful information here. I’m sending it to a few pals ans additionally sharing in delicious.
And naturally, thanks for your sweat!
It’s very straightforward to find out any matter on net as compared to books, as I found this post at
this site.